This is part II of the lab using Azure ML Studio. The first part is in this link.
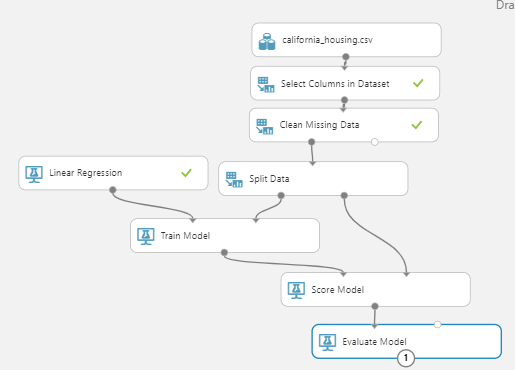
Open the California House Price Prediction experiment.
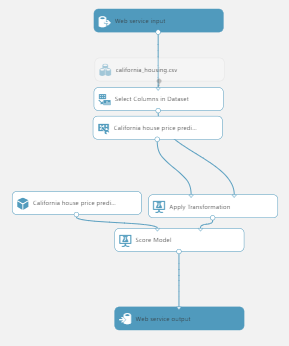
Click “Run”, then click “Set up as a web service”, then click “Predictive Web Service (Recommended)”, then click Run the Predictive Web Service Experiment
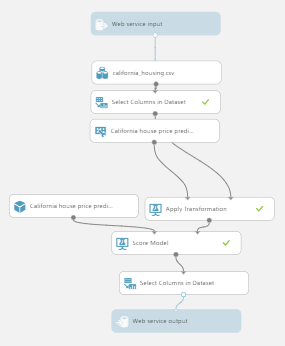
Drag and drop the “Select Columns from Dataset” module at the end, just before Web Service Output. In this module, select “Scored Labels”. Run the experiment again and then Click Deploy Web Service.
These are the steps you went through:
Congrats! You have deployed a ML model and it is ready for testing. In the new screen that appears, click “Test preview”. (shown by red arrow in this image below).

In the Test screen, try these values and observe this output:

Key take aways from this experiment:
This lab helped explored a no code way to deploy ML models. This gives us Web Service end points which can be used to integrate this model into any typical business application process easily. Hope you enjoyed this. There is a post with Python call to this model and a batch of rows so we can predict not just a single house price but a whole set of them.
In real life, if this model was integrated into a Web Portal of a real estate agency: if details about the property was entered into similar fields, we can get the predicted price as output.