Overview
In this lab, you will use Azure Machine Learning to train, evaluate, and publish a Machine Learning model. This lab intends to be a gentle, guided introduction to core ML concepts. After completing this lab, you will have enough familiarity with the platform and basic ML concepts to continue exploring on your own.
I plan to upload videos of these demos on the playfullySerious YouTube channel. If interested, you can subscribe so you will get notified when they are up. They can help you practice later on.
Pre requisites
To complete this lab, you will need the following:
- A Microsoft account
- Go to login.live.com and using any personal email ID you have to set up one. I use my gmail to do this.
- A web browser and Internet connection
- Visit login.azureml.net to get started
Upload the datasets to Azure ML studio
There are two datasets for this tutorial: contract_renewal.csv and employee_attrition.csv. These are available in this google drive link. Download and save in your machine.
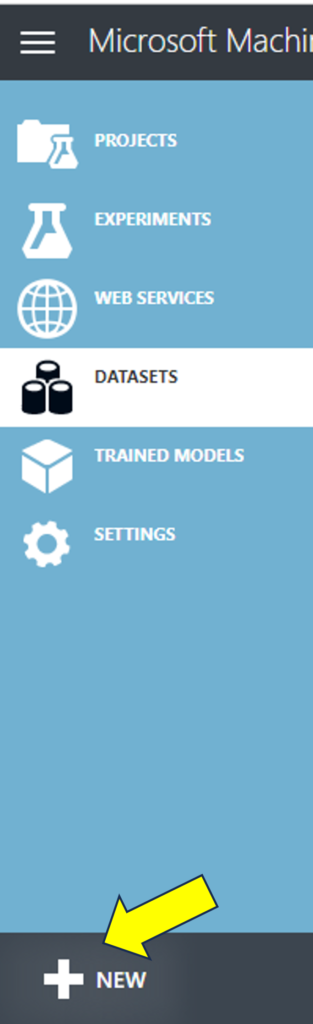
Now go to Azure ML studio, (you have logged in), click on Datasets and then at the bottom, + New then select From local file to upload the two datasets.
Experiment 1: Decision Tree Classifier – Predict Contract Renewal
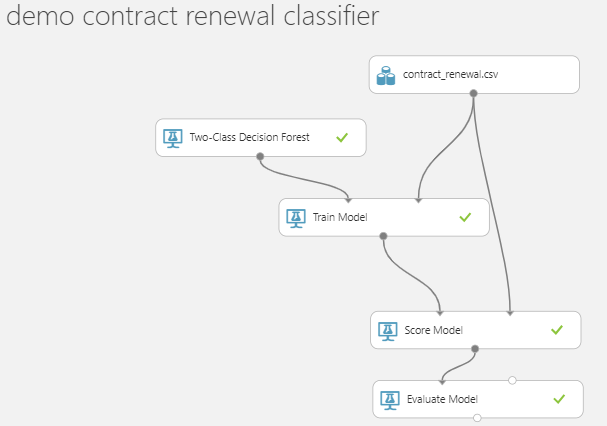
Click on Experiments, then click +NEW, then select Blank Experiment to create one. It will have a name like “Experiment Created on…” at the top. Click on that and replace it with a name like my_classification_experiment.
Expand the “Saved Datasets” and then from under My Datasets menu, select and drag the dataset contract_renewal.csv to the top box in the canvas.
Add modules from the available set to create the following experiment flow.
Configure the decision forest module initial fields like these, the others can be left as such: 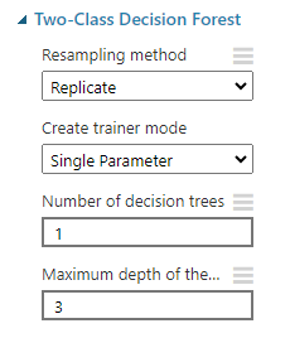
The train module expects the target column to be specified. Click on the train module, then from the properties window on right side, click “Launch Column Selector”:

The Score module and Evaluate modules do not require specific configuration. They automatically set these up.
Save and Run the experiment. Click on the output port of Evaluate Model and observe the following results:
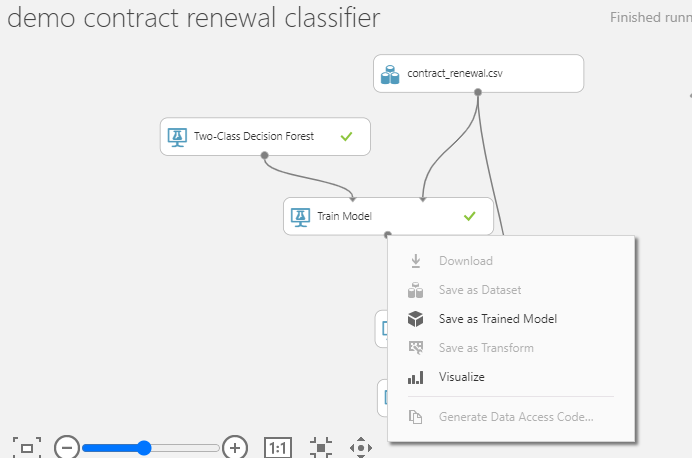
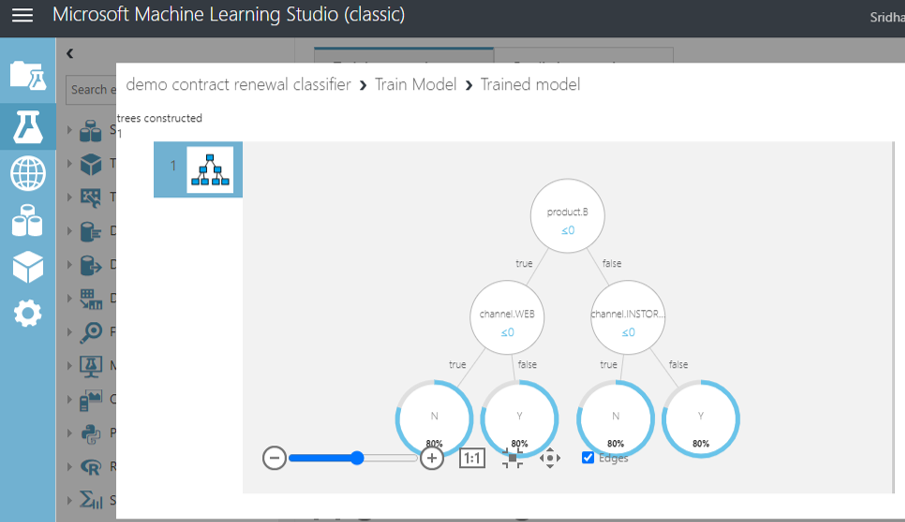
Click on the train model module output port and select visualize:
Observe the structure of the decision tree, the probabilities calculated at the bottom. In MS Excel open the contract_renewal.csv and you can easily see why it built the tree like this.
Just like you visualized the output of train model module, now go to Score Model module and visualize. This module uses the trained model to predict the target column.

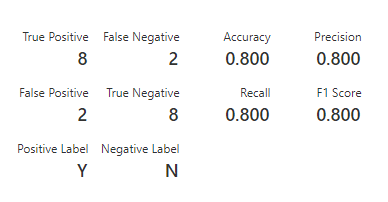
Similarly go to output of Evaluate Model module and visualize. This has a lot of outputs. We are just focusing on the most basic one – Accuracy. Our model was able to predict correct target values for 80% of the rows.
Recap of key take aways from the Experiment 1:
- How to add your own dataset to Azure ML repository
- How to create a new experiment and observe the model performance metrics
- Basic terminology associated with ML: Features, Label, Regression vs Classification, Model evaluation metrics
Save the experiment. For the next one, click on Experiment tab and + to create a new blank experiment.
Experiment 2: Predict Employee Attrition
This experiment builds on the basic awareness of how Azure ML experiments are created. This lab will focus on several ML concepts.
Create a new experiment using steps learned in the previous lab to achieve this workflow:
Expand the “Saved Datasets” and then from under My Datasets menu, select and drag the dataset employee_attrition.csv to the top box in the canvas.
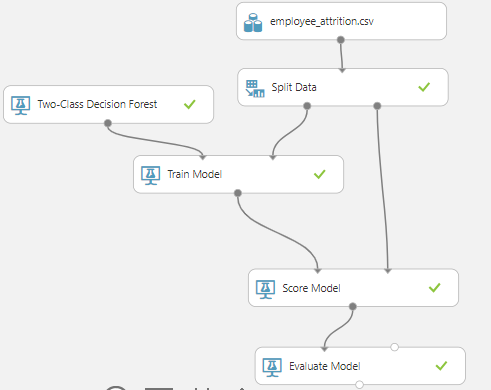
Search for each of the modules by their name on the wizard menu on the left size, drag them. Connect them as shown in the image.
Click and configure the Decision Forest module like the previous experiment.
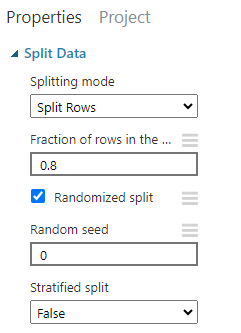
Click on the Split Data module, change the 0.5 to 0.8. Leave the rest as such.
Click on train model module, select attrition as the target column to predict

The Score Model and Evaluate Model modules are automatically configured by Azure ML.
Change the name of the experiment to “Employee Attrition Prediction” and Save. Then Run.
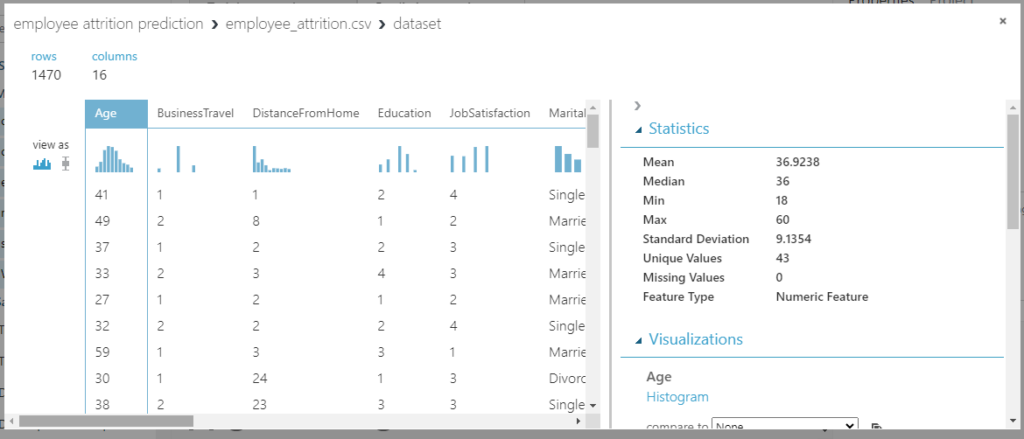
Click on each module output port and visualize. Start with the dataset module. You can see the data, exploratory statistics.
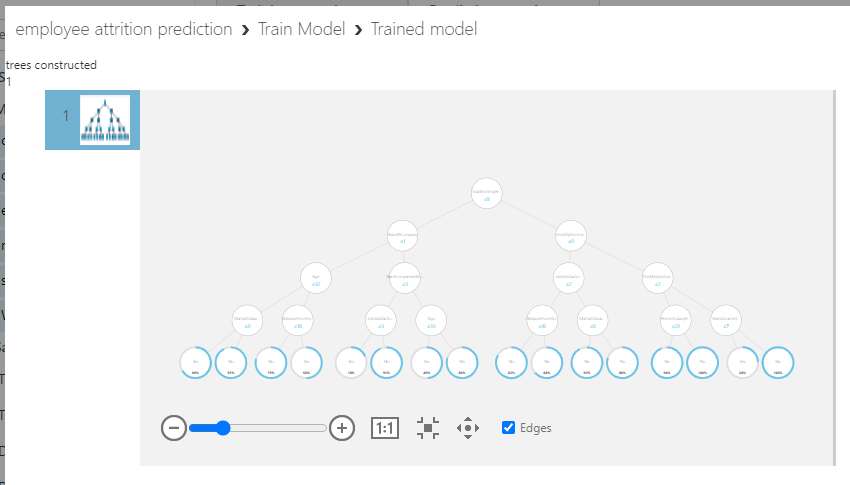
click on the Train Model module, visualize the single decision tree built:
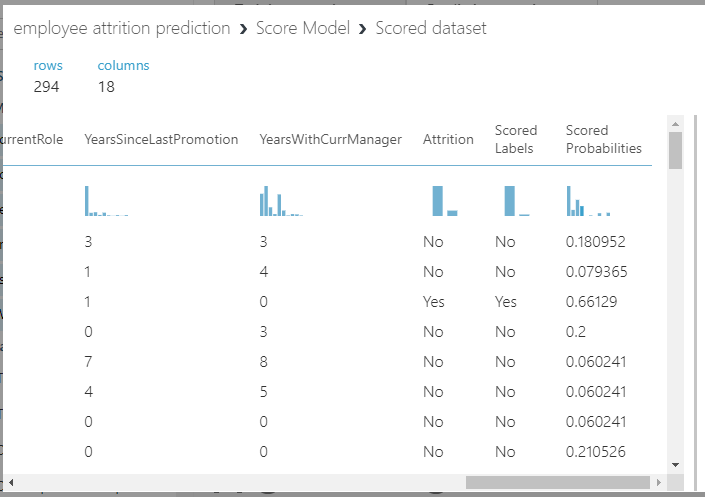
Click on Score Model module and visualize the predicted values. Scroll to the right if needed.
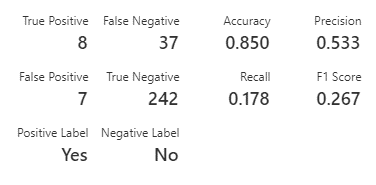
Finally, click on the Evaluate Module module and visualize. Scroll down to see the accuracy. It has predicted 84.7% of the rows in the test dataset correctly.

Not bad for a quick attempt!
Here are ways to improve the model.
Step1: Go to Decision Forest module, change like this and run the experiment.

And we can see a mild improvement:
Other ways of improvement include replacing the algorithm with another. For e.g. Two-Class Boosted Decision Tree.
Save this experiment. Run. Get ready to deploy and make a Web Service request.
Experiment 3: Deploy the Predict Employee Attrition experiment and test
Create Predictive Experiment like this:
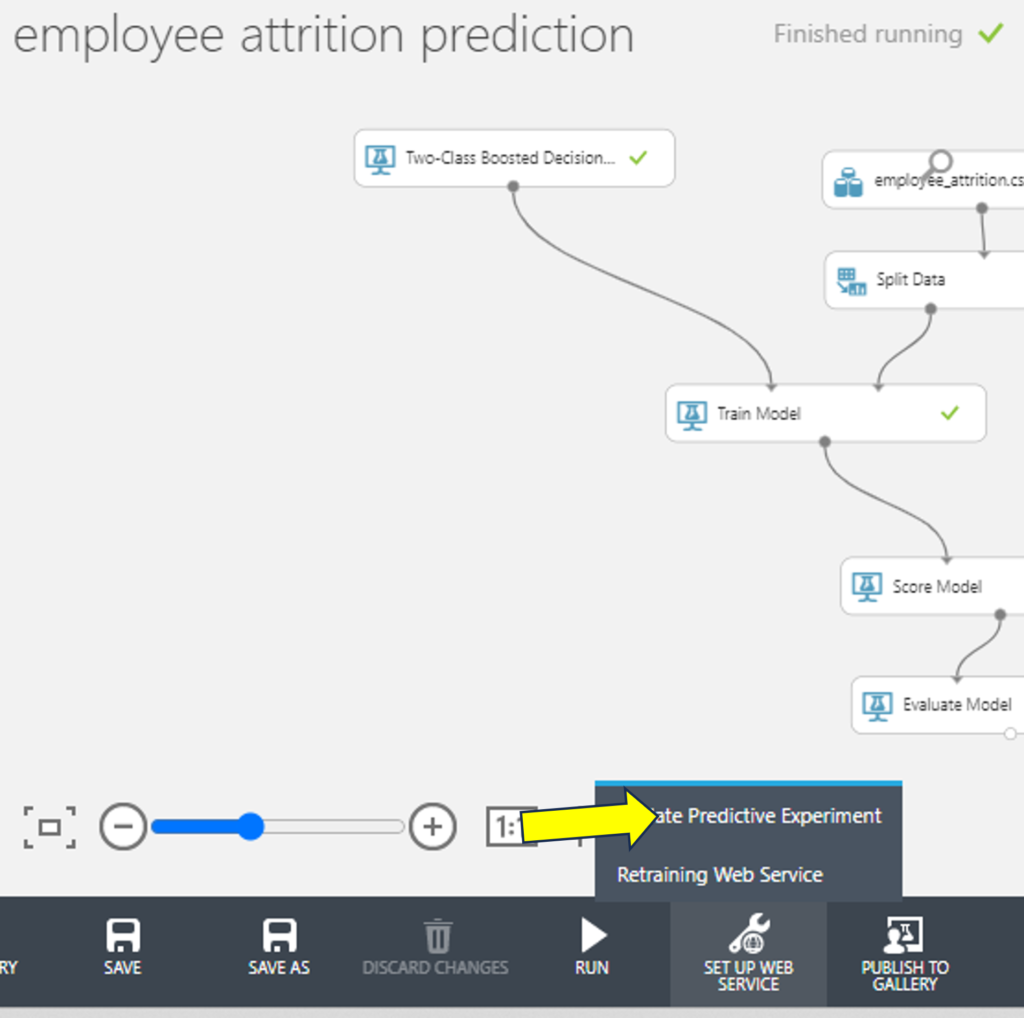
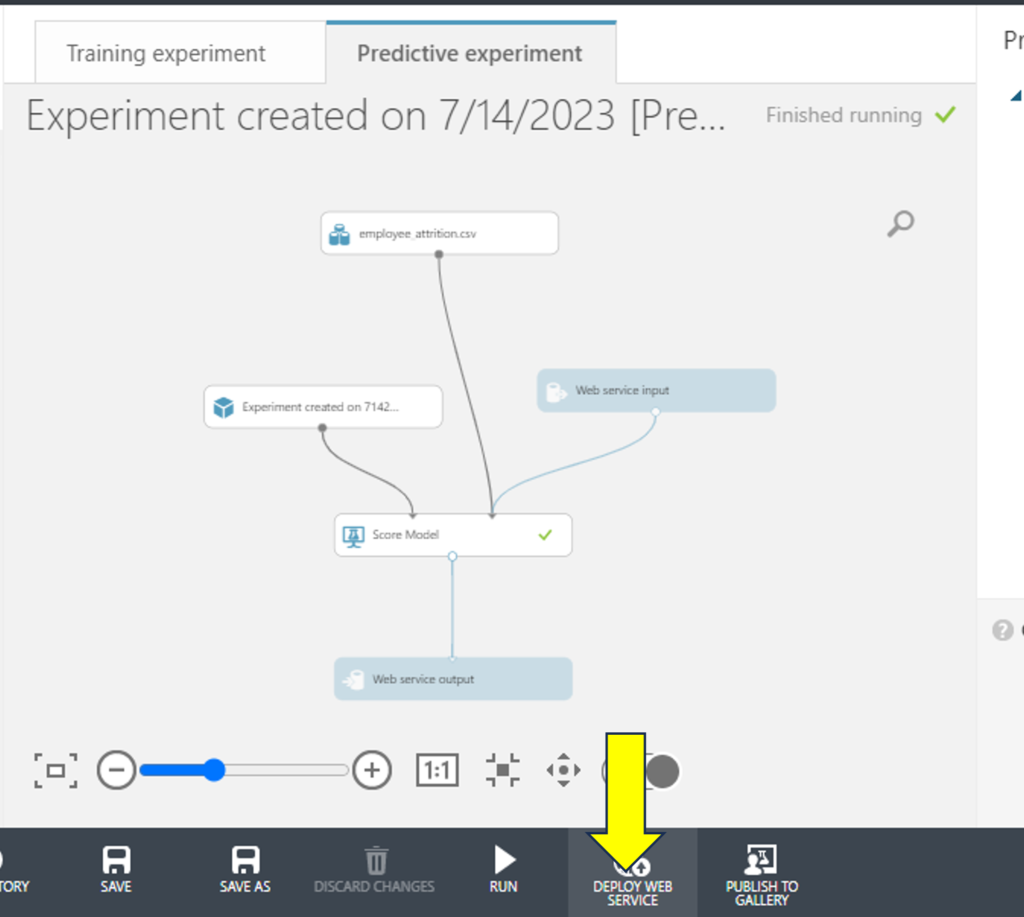
This will add a new tab with Predictive Experiment workflow added. Save and Run.
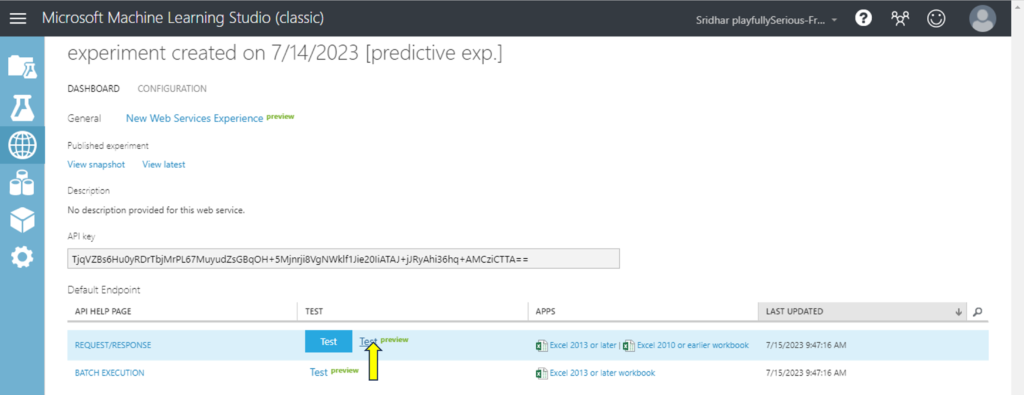
Last step, Click Deploy Web Service button
This leads to deployment of the experiment on Azure platform and you will see a simple interface using which you can now call this Web Service and test.
Click Test Preview button to launch a request to the Web Service and test using a sample record.
This will open up a convenient form to key in test data and try out the model prediction. The same can also be called from a python script for e.g.
Enter data like this and submit to see the prediction:
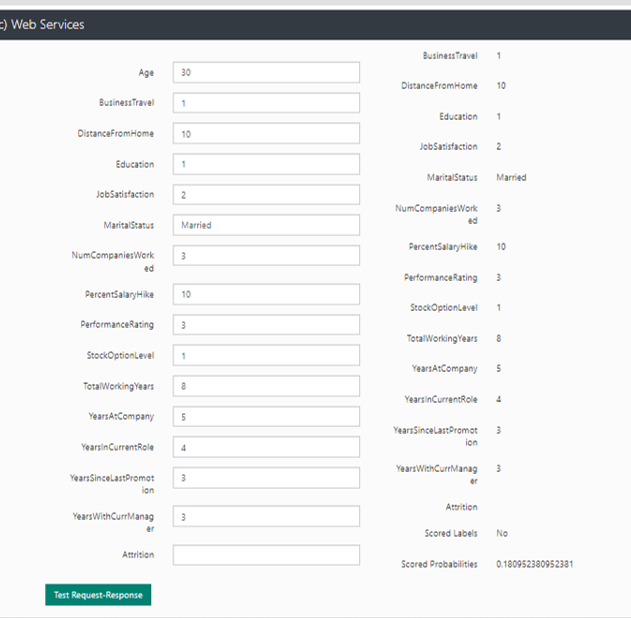
Based on the input, the model predicted the probability of 0.18 for “Yes” and output the predicted target value as “No”.
Key take aways from this experiment:
This lab helped explored a no code way to deploy ML models. This gives us Web Service end points which can be used to integrate this model into any typical business application process easily.
It is possible to make a call to this model from python code with a batch of rows so we can predict not just a single row but a whole set of them.
In a simple way, such a model can be deployed on cloud and accessed though a web app. See this tutorial on how to.
Hope you enjoyed this.